



Quick Answer
To change a tire, park on flat ground, engage the parking brake, loosen the lug nuts slightly, jack up the car, remove the flat tire, mount the spare, hand-tighten the lug nuts, lower the car, then fully tighten the nuts in a star pattern.
Most drivers won’t touch their spare tire until the exact moment they’re stranded on a busy highway shoulder, hazards blinking, cars roaring past at 70 mph. That’s the worst possible time to learn something new. Knowing how to change a tire before you actually need to isn’t just convenient — it’s a basic form of self-protection on the road.
Here’s what nobody tells you: changing a tire isn’t hard. It’s the panic that makes people mess it up. You’ve probably seen someone on the side of the road, tire iron in hand, looking completely lost. That doesn’t have to be you.
This guide walks you through the entire process — from the tools you need to the exact order you should loosen and tighten those lug nuts — so you can handle a flat with confidence instead of dread. By the end, you’ll know exactly what to do, what to avoid, and how to stay safe while doing it.
What Is a Tire Change and Why It Matters Today
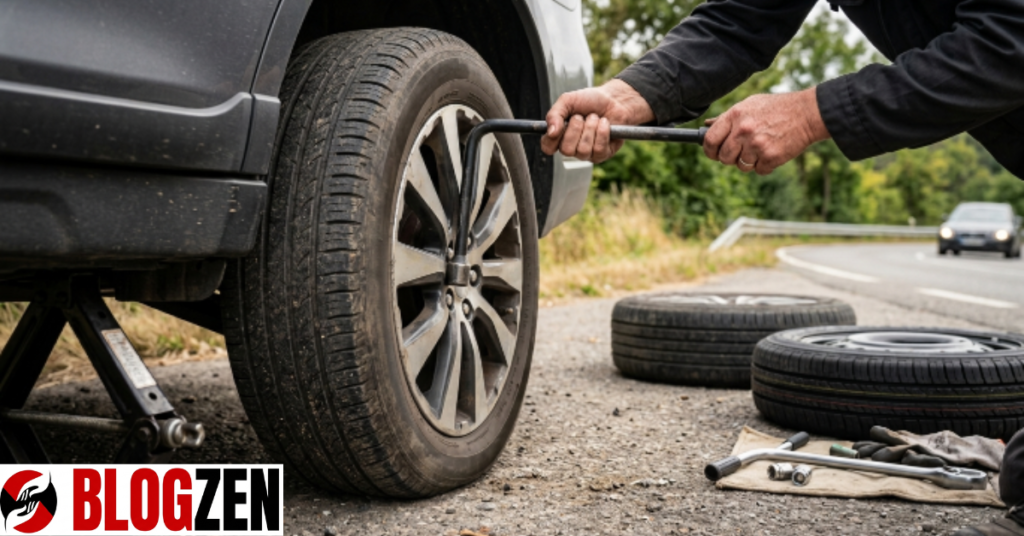
A tire change is the process of removing a damaged, flat, or worn tire and replacing it with a spare or new one, using a jack and lug wrench to lift and secure the vehicle safely. It sounds simple in theory. In practice, most people freeze the first time they actually have to do it.
Modern cars are more reliable than ever, which is exactly the problem. Fewer breakdowns mean fewer chances to practice basic roadside skills. According to AAA, roughly one in three drivers today wouldn’t be able to change a flat tire without help — a number that’s climbed steadily as run-flat tires and roadside assistance apps have become the default fallback.
The truth is, apps and tow trucks aren’t always available. Cell service drops out in rural stretches. Roadside assistance can take 45 minutes to two hours during peak times or bad weather. Knowing how to handle a flat yourself means you’re never fully dependent on someone else showing up.
That independence matters more than most people realize — especially late at night, in remote areas, or when you’re traveling somewhere unfamiliar.
How Changing a Tire Actually Works
Let me explain why this process works the way it does. A car’s weight rests on four contact points, and lifting even one corner safely requires the right leverage, the right surface, and the right sequence of steps. Skip a step, and you’re not just risking a bad tire change — you’re risking the car falling off the jack.
Here’s the logic behind the process: you loosen the lug nuts before lifting the car because the wheel needs to stay still while you break the initial resistance. Once the car is in the air, the wheel spins freely, making it far harder to loosen anything. This single detail trips up more first-timers than anything else.
The Core Sequence
- Park on firm, flat ground — never on a soft shoulder or incline
- Turn on hazard lights and engage the parking brake
- Loosen (don’t remove) the lug nuts while the tire is still on the ground
- Position the jack under the vehicle’s designated jack point
- Raise the car until the flat tire is a few inches off the ground
- Fully remove the lug nuts and pull off the flat tire
- Mount the spare tire onto the wheel bolts
- Hand-tighten the lug nuts, then lower the car
- Fully tighten the lug nuts in a star (crisscross) pattern
Pro Tip: Always tighten lug nuts in a star pattern rather than going around in a circle. This distributes pressure evenly and keeps the wheel from sitting crooked on the hub.
Common Mistakes People Make When Changing a Tire
Most people get this completely wrong on their very first attempt, and it’s usually not because the steps are confusing — it’s because they skip the prep work. Jumping straight to jacking up the car without checking the ground, the brake, or the lug nuts first sets up almost every other mistake that follows.
One of the biggest errors is placing the jack in the wrong spot. Every vehicle has a specific reinforced jack point, usually marked in the owner’s manual or with a small notch under the frame. Jacking up the car anywhere else — like the middle of the floor pan — can dent the body or, worse, cause the car to slip off the jack entirely.
Another frequent mistake: fully removing the lug nuts before lifting the car. Once the wheel is off the ground, it spins with no resistance, making those loose nuts almost impossible to control. Always loosen the nuts about a quarter-turn while the tire is still grounded.
Why Rushing Causes Real Danger
Think of it this way — a rushed tire change on a highway shoulder is one of the most dangerous roadside tasks a driver can attempt. Passing traffic, uneven ground, and low visibility all compound the risk. Taking an extra 60 seconds to park farther from traffic and set up properly isn’t slow — it’s smart.
Expert Tips and Proven Strategies
Here’s what nobody tells you about tire changes: the tools matter almost as much as the technique. A rusty, undersized lug wrench or a jack rated for the wrong weight class turns a five-minute job into a 30-minute struggle.
Before you’re ever stuck on the road, check that your spare tire is properly inflated — spares lose air over time just like regular tires, and a flat spare is useless in an emergency. Most manufacturers recommend checking spare tire pressure every three months, matching it to the PSI listed inside the driver’s door.
Pro Tip: Keep a small breaker bar or cheater pipe in your trunk. Factory lug nuts are often torqued extremely tight, and a standard tire iron alone may not generate enough force to break them loose, especially if they were last tightened by an impact wrench at a shop.
Tools That Actually Make a Difference
- A properly inflated spare (full-size or compact)
- A scissor or hydraulic jack rated for your vehicle’s weight
- A four-way lug wrench (easier leverage than an L-shaped one)
- Wheel wedges or bricks to prevent rolling
- A flashlight or headlamp for nighttime changes
Real-World Examples: When Preparation Paid Off
Consider a driver on a rural interstate at 11 p.m., miles from the nearest town, with zero cell signal. Roadside assistance wasn’t an option — not because the app failed, but because there was no connection to call for help at all. Because the spare had been checked a month earlier and the jack points were already familiar, the entire change took under 12 minutes.
Compare that to a more common scenario: a driver stranded in a parking lot who couldn’t find the jack point, tried lifting the car from the plastic underbody trim, and cracked it. What should have been a 10-minute fix became a repair shop visit and a tow bill.
The difference between these two outcomes isn’t luck — it’s preparation. The few minutes you spend learning this now can save hours of stress later.
Step-by-Step Guide: Changing a Tire the Right Way
Let’s walk through this one more time, in full detail, so there’s no ambiguity when you actually need it.
First, find a safe spot. Pull as far off the road as possible, onto flat, stable ground — never a hill or soft shoulder. Turn on your hazard lights immediately, even before you stop the car completely.
Second, secure the vehicle. Engage the parking brake and, if you’re on any kind of incline, place a wheel wedge or heavy object behind the tires diagonally opposite the flat.
Third, loosen the lug nuts a quarter turn while the wheel is still on the ground — this is the step people skip most often, and it’s the one that causes the most frustration later.
Fourth, position the jack at the correct point (check your manual) and raise the vehicle until the flat tire clears the ground by a few inches.
Fifth, remove the lug nuts fully, pull off the flat tire, and set it aside. Mount the spare onto the wheel bolts, then hand-tighten each lug nut.
Sixth, lower the vehicle back to the ground and remove the jack. Finish tightening the lug nuts in a star pattern using your full body weight for leverage.
Drive cautiously on a compact spare — most are rated for no more than 50 mph and shouldn’t be used for more than 70 miles before getting a proper tire installed.
What to Avoid: Myths vs. Facts
There’s a lot of bad advice floating around about tire changes, and some of it is genuinely dangerous. Let’s clear a few things up.
Myth: You should fully loosen the lug nuts before jacking up the car.
Fact: Only loosen them partially while grounded — full removal happens after lifting.
Myth: Any flat surface under the car is a safe jack point.
Fact: Only the manufacturer-designated points can support the car’s weight without damage or collapse.
| Myth | Fact |
|---|---|
| Compact spares are fine for long drives | Most are limited to 50 mph and ~70 miles |
| Tightening lug nuts in a circle is fine | Star pattern prevents uneven wheel seating |
| Roadside assistance is always fast | Wait times can exceed an hour in bad conditions |
| Any jack works for any car | Jack must match your vehicle’s weight rating |
The biggest myth of all is that this skill isn’t worth learning because “help is always available.” Help isn’t always available — and even when it is, knowing how to change a tire yourself means you’re never stuck waiting.
Conclusion
Changing a tire comes down to three things: preparing before you’re stranded, following the loosen-jack-remove-mount sequence in the right order, and prioritizing safety over speed. Master those three, and a flat tire goes from a crisis to a minor inconvenience.
Don’t wait until you’re on the shoulder of a highway to figure this out. Grab your owner’s manual this week, locate your jack points, and check your spare’s air pressure — it takes five minutes and could save you hours down the road.
Got a tire-change story or a question about your specific vehicle? Drop it in the comments below — and if you haven’t checked your emergency roadside kit lately, now’s the time.
A flat tire doesn’t have to ruin your day. Now you know exactly what to do.
FAQs
How long does it take to change a tire?
Most people can change a tire in 10 to 20 minutes once they’re familiar with the process, though first-timers often take closer to 30. Factors like weather, lighting, and rusted lug nuts can extend this. Practicing once in your driveway dramatically cuts down real-world time.
Can I drive on a spare tire long-term?
No — compact “donut” spares are designed for short-term use only, typically capped at around 70 miles and 50 mph. Driving further can wear out the spare quickly and stress your car’s drivetrain, especially on all-wheel-drive vehicles. Get your regular tire repaired or replaced as soon as possible.
What tools do I need to change a tire?
You’ll need: 1) a jack, 2) a lug wrench, 3) a properly inflated spare tire, and 4) ideally a flashlight and wheel wedges. Most cars come with the first three stored in the trunk. Checking these before a road trip is one of the simplest ways to avoid roadside stress.
Is it safe to change a tire on the highway shoulder?
It can be risky due to passing traffic, so pull as far off the road as possible and keep hazards on at all times. If the shoulder feels too narrow or unstable, it’s often safer to call roadside assistance instead of attempting it yourself. Visibility and distance from traffic matter more than speed.
Why won’t my lug nuts loosen?
Overtightened lug nuts — often from an impact wrench at a shop — are the most common culprit. Using a breaker bar, standing on the wrench for extra leverage, or applying penetrating oil to rusted nuts can help. Never use excessive heat, as it can warp the wheel.
What’s the difference between a full-size and compact spare?
A full-size spare matches your regular tire’s dimensions and can be driven long-term, while a compact spare is smaller, lighter, and meant only for short trips to a repair shop. Full-size spares add trunk weight but offer far more flexibility. Check your owner’s manual to see which type your vehicle includes. VISIT BLOGZEN
